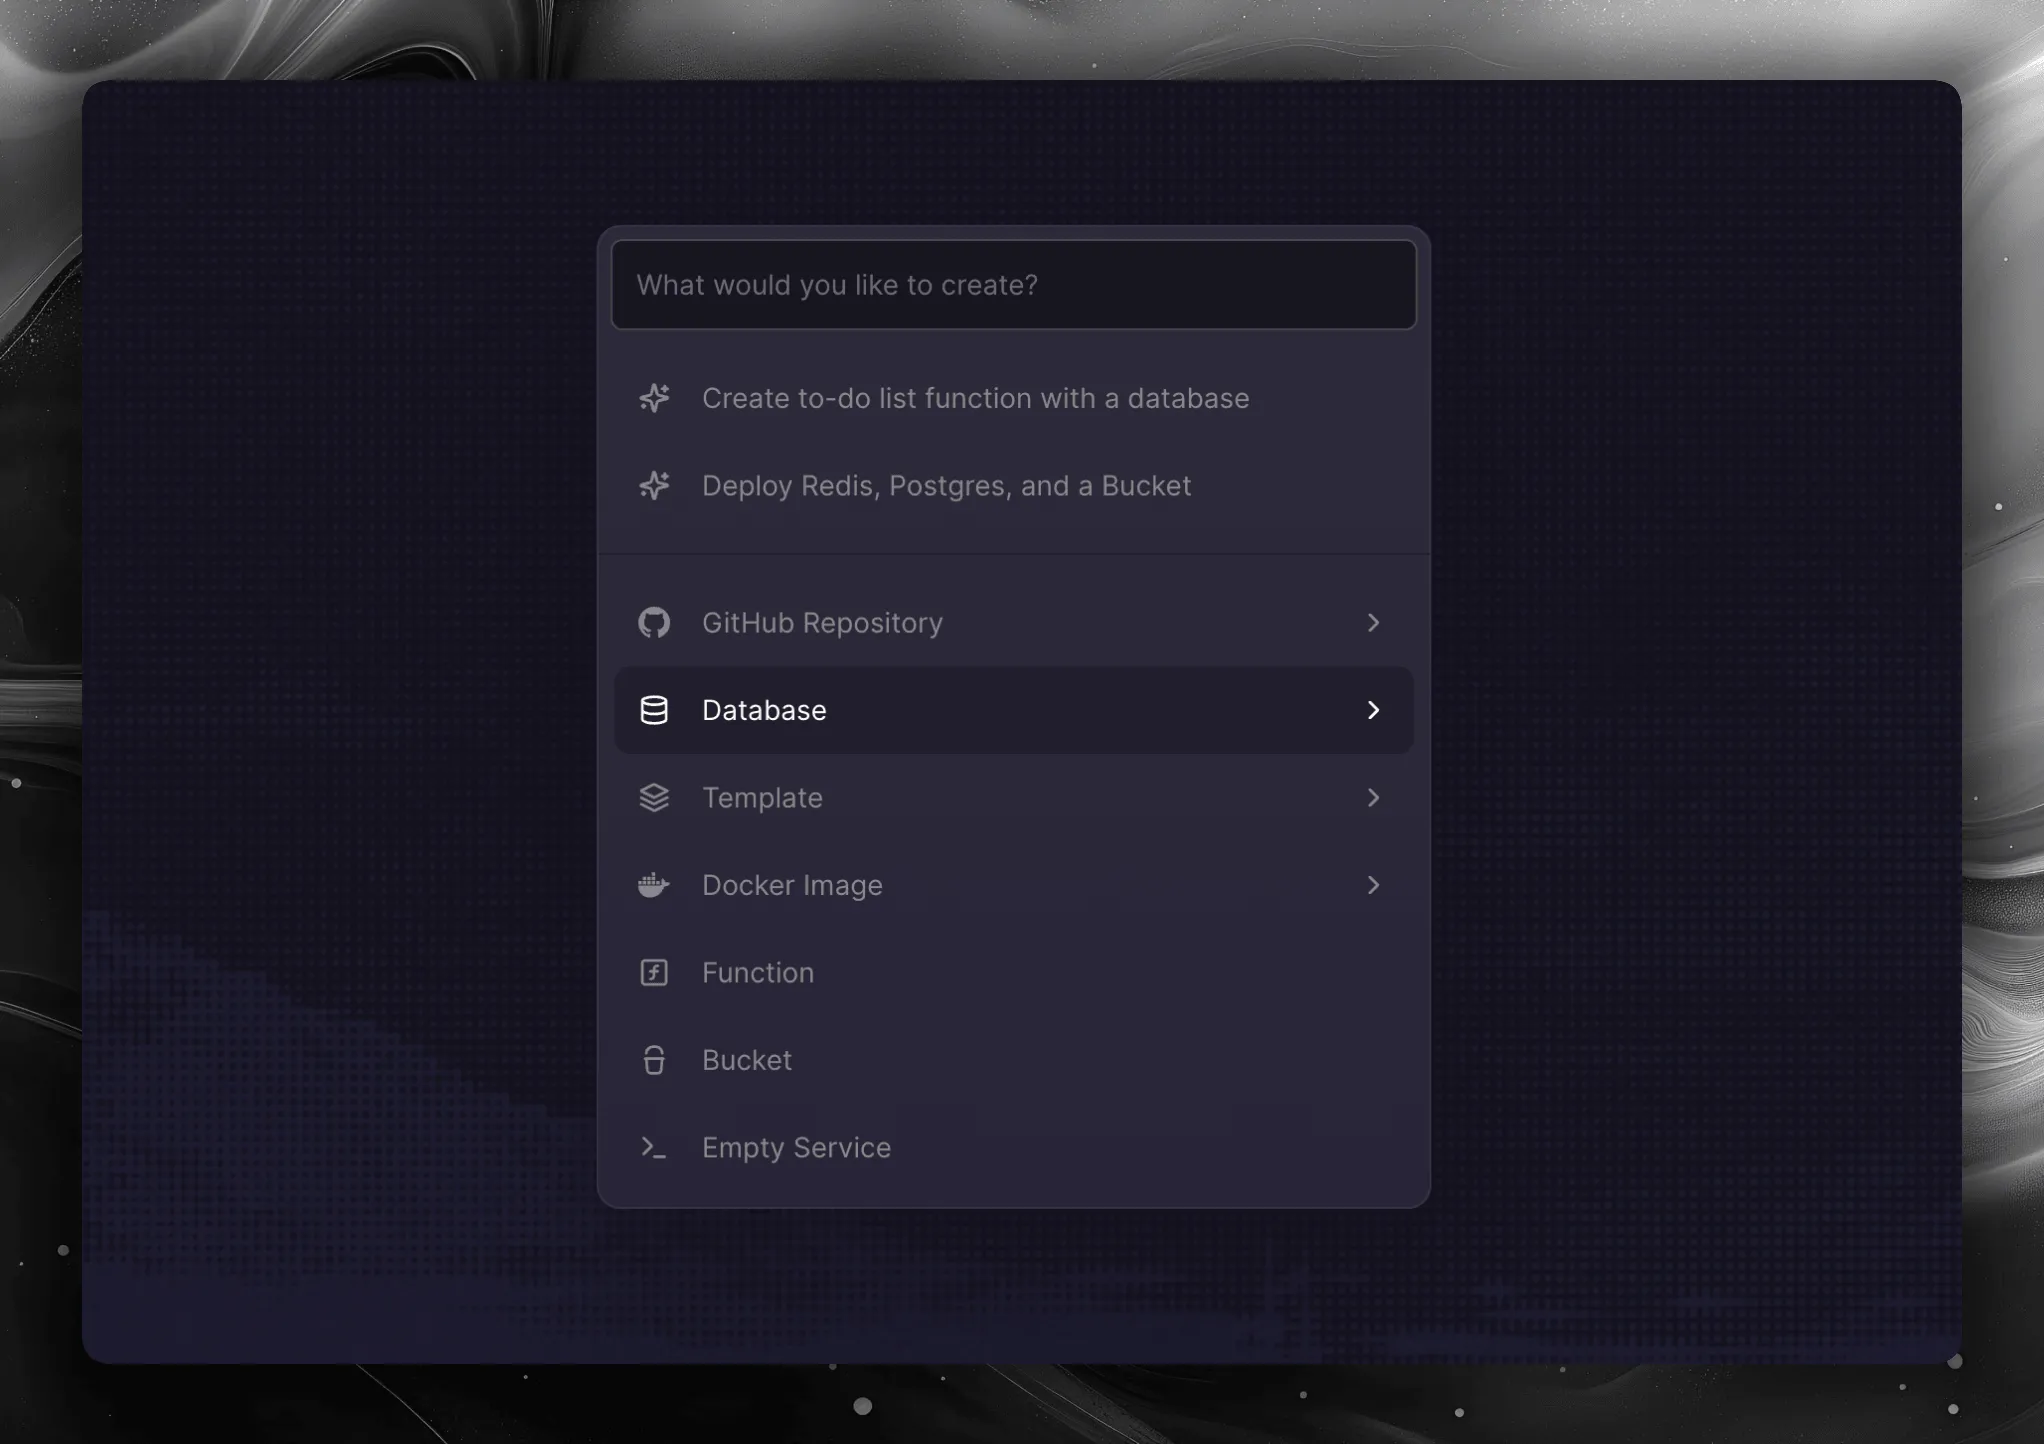
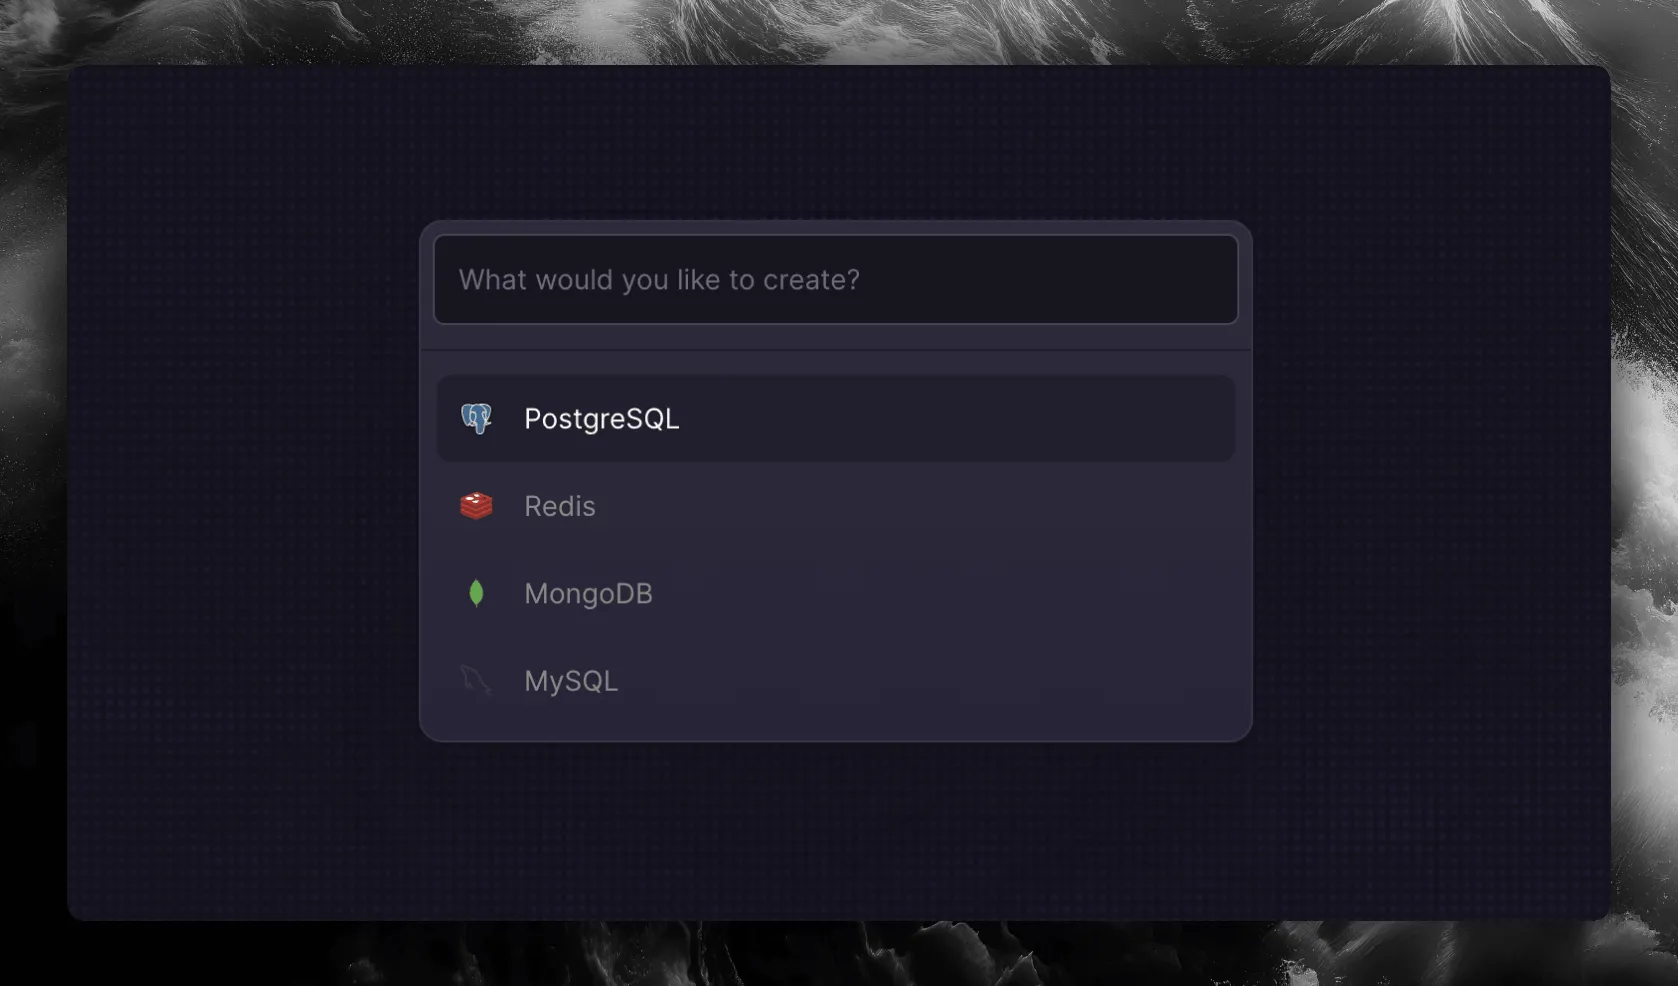
On the project canvas, click the New button in the top right corner and select Database → PostgreSQL. You can also use the command palette (Cmd/Ctrl + K) and search for PostgreSQL. Railway will provision a new PostgreSQL instance for you.
Get your connection string
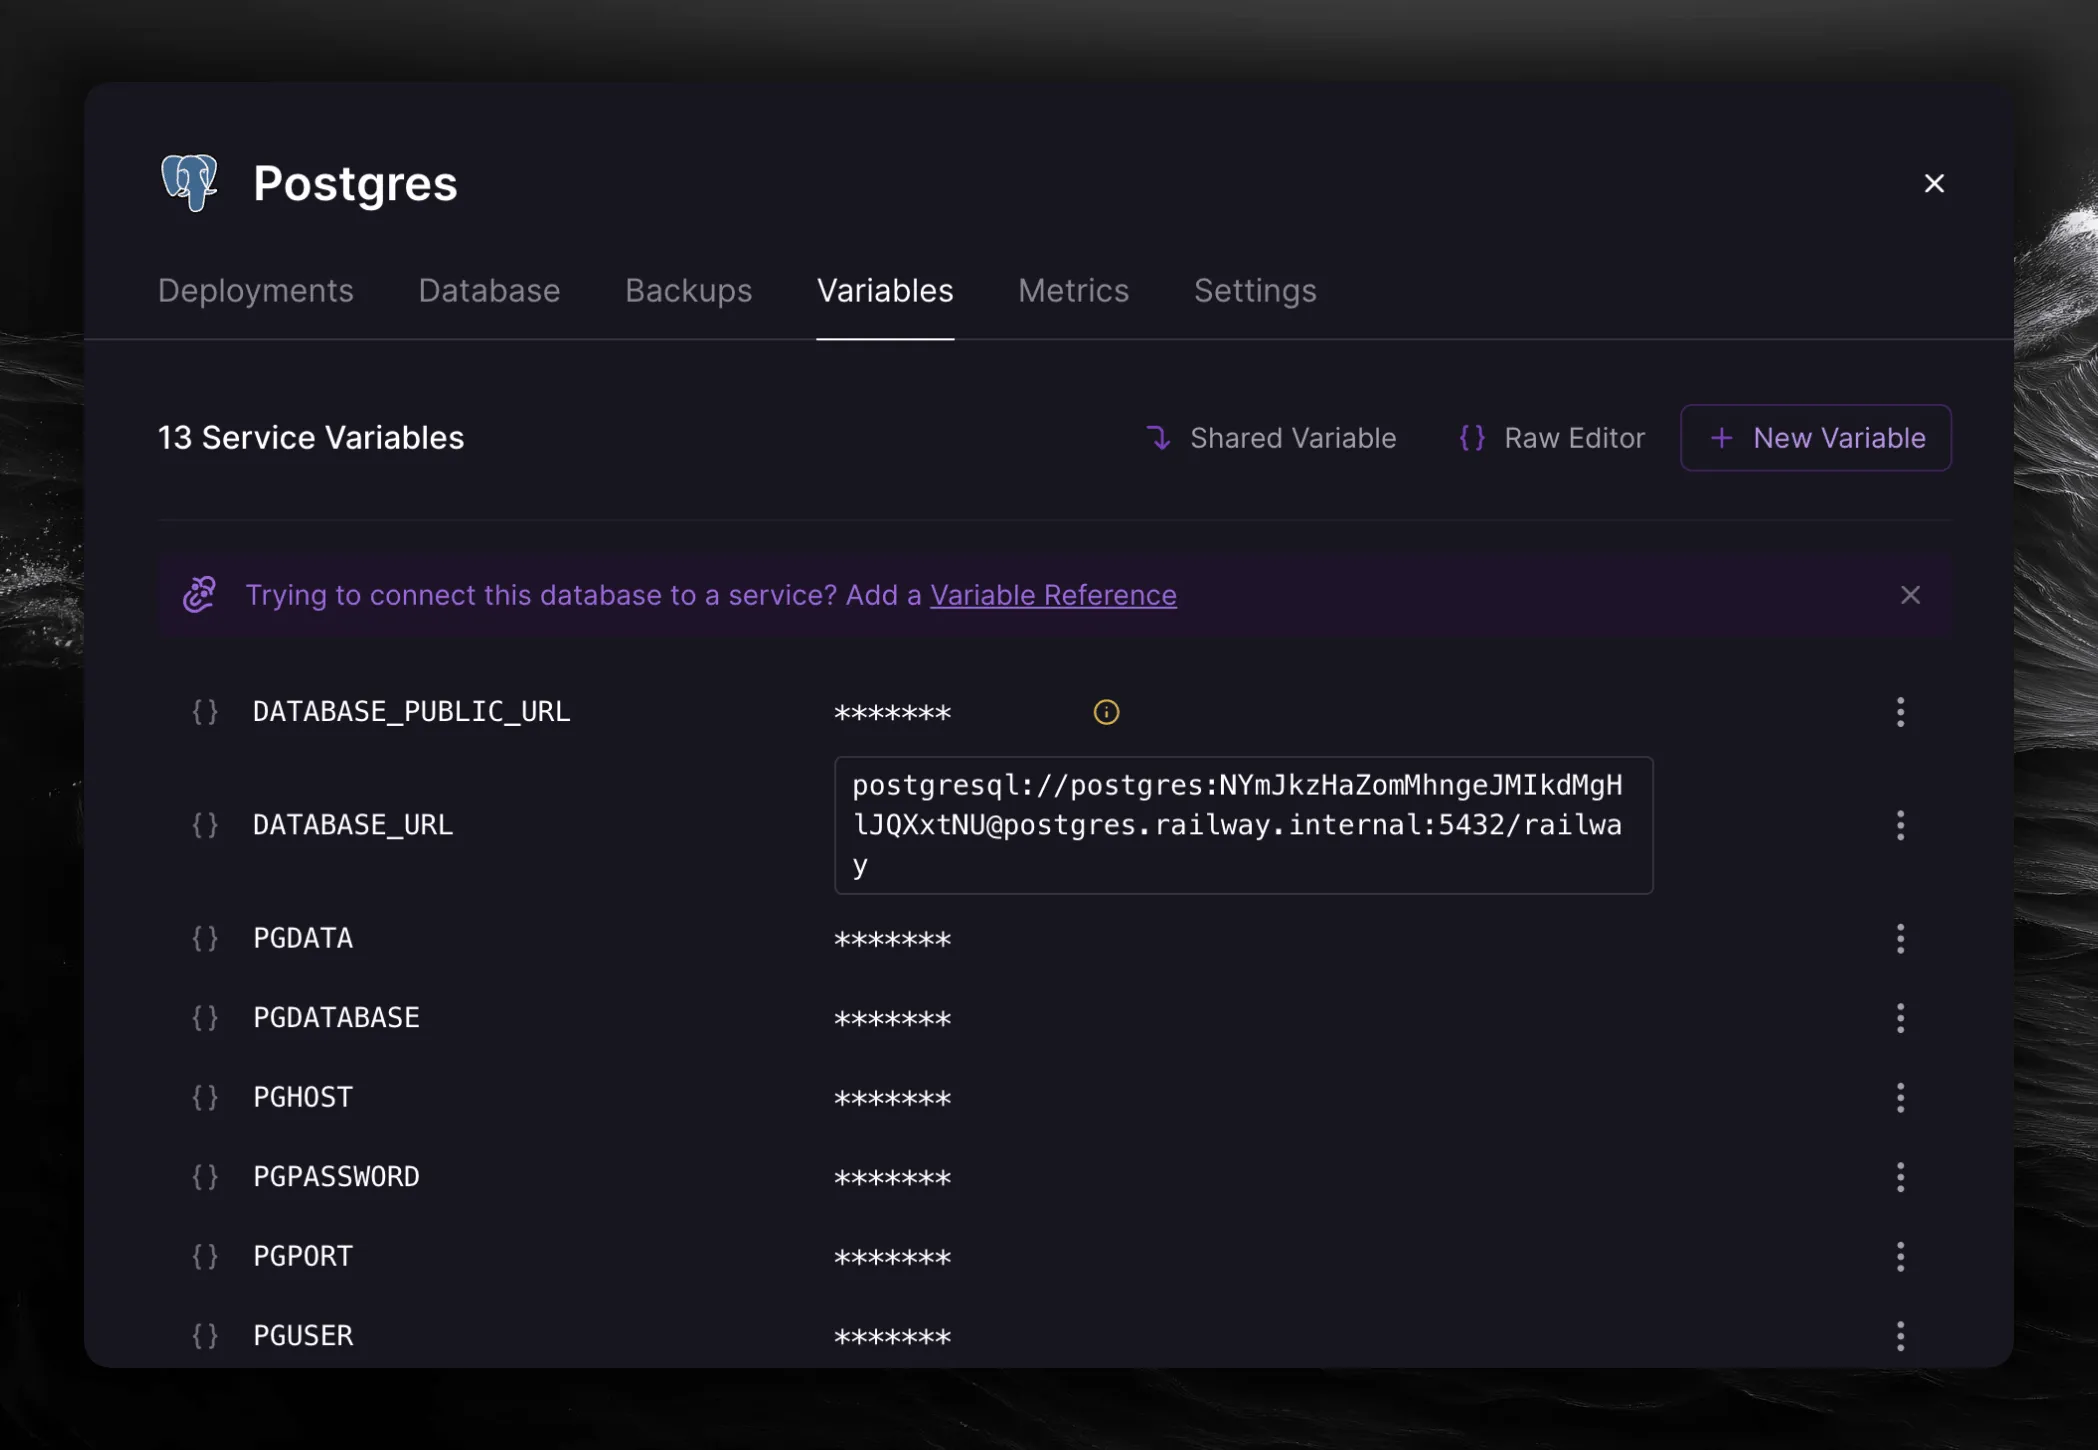
Click on the PostgreSQL service in your project, go to the Variables tab, and find the DATABASE_PUBLIC_URL variable. Copy the value — it should look similar to this:
Railway provides two types of database connection URLs:
Public URL — accessible from anywhere (your local machine, external services). Uses a TCP proxy and looks like postgresql://postgres:password@region.railway.app:port/railway.
Private URL — only accessible from services within the same Railway project via internal networking. Uses *.railway.internal hostname.
For local development (like running drizzle-kit push or drizzle-kit studio), you must use the public URL. The private *.railway.internal hostname will not resolve from your local machine.
Setup connection string variable
Create a .env file in the root of your project and add the DATABASE_URL environment variable. Use the public connection string from Railway:
This .env file is for local development only. When deploying to Railway, you
will configure the DATABASE_URL environment variable separately in the
Railway dashboard using a service reference variable.
Connect Drizzle ORM to your database
Create a db.ts file and set up your database configuration:
src/db.ts
import { drizzle } from "drizzle-orm/node-postgres";export const db = drizzle(process.env.DATABASE_URL!);
Create tables
Create a schema.ts file and declare your tables:
src/schema.ts
import * as p from "drizzle-orm/pg-core";export const usersTable = p.pgTable("users", { id: p.serial().primaryKey(), name: p.text().notNull(), age: p.integer().notNull(), email: p.text().notNull().unique(),});export const postsTable = p.pgTable("posts", { id: p.serial().primaryKey(), title: p.text().notNull(), content: p.text().notNull(), userId: p .integer() .notNull() .references(() => usersTable.id, { onDelete: "cascade" }), createdAt: p.timestamp().notNull().defaultNow(), updatedAt: p .timestamp() .notNull() .$onUpdate(() => new Date()),});export type InsertUser = typeof usersTable.$inferInsert;export type SelectUser = typeof usersTable.$inferSelect;export type InsertPost = typeof postsTable.$inferInsert;export type SelectPost = typeof postsTable.$inferSelect;
Setup Drizzle config file
Drizzle config - a configuration file that is used by Drizzle Kit and contains all the information about your database connection, migration folder and schema files.
Create a drizzle.config.ts file in the root of your project and add the following content:
You can generate migrations using drizzle-kit generate command and then run them using the drizzle-kit migrate command.
Generate migrations:
bunx drizzle-kit generate
The generate command only creates migration SQL files based on your schema — it does not apply any changes to the database. These migrations are stored in the migrations directory, as specified in your drizzle.config.ts. This directory will contain the SQL files necessary to update your database schema and a meta folder for storing snapshots of the schema at different migration stages.
Example of a generated migration:
CREATE TABLE "posts" ( "id" serial PRIMARY KEY NOT NULL, "title" text NOT NULL, "content" text NOT NULL, "userId" integer NOT NULL, "createdAt" timestamp DEFAULT now() NOT NULL, "updatedAt" timestamp NOT NULL);--> statement-breakpointCREATE TABLE "users" ( "id" serial PRIMARY KEY NOT NULL, "name" text NOT NULL, "age" integer NOT NULL, "email" text NOT NULL, CONSTRAINT "users_email_unique" UNIQUE("email"));--> statement-breakpointALTER TABLE "posts" ADD CONSTRAINT "posts_userId_users_id_fk" FOREIGN KEY ("userId") REFERENCES "public"."users"("id") ON DELETE cascade ON UPDATE no action;
Apply the generated migrations to the database:
bunx drizzle-kit migrate
In this tutorial, migrations are applied automatically on application startup
using migrate() from drizzle-orm/node-postgres/migrator. You can also
apply them manually with drizzle-kit migrate for local testing.
Push command is good for rapid prototyping in local development, allowing fast
iterations without managing migration files. For production deployments,
prefer the generate + migrate workflow to keep a versioned history of
schema changes.
Basic file structure
This is the basic file structure of the project. In the src directory, we have database-related files including connection in db.ts and schema definitions in schema.ts.
Once you’ve generated your migrations, commit the migrations directory to your repository — these files will be applied automatically when your app starts.
Create an index.ts file as the entry point for your application. This example runs migrations on startup and then starts a simple HTTP server using Bun:
src/index.ts
import { drizzle } from "drizzle-orm/node-postgres";import { migrate } from "drizzle-orm/node-postgres/migrator";import { usersTable } from "./schema";const db = drizzle(process.env.DATABASE_URL!);await migrate(db, { migrationsFolder: "./migrations" });const server = Bun.serve({ port: process.env.PORT || 3000, async fetch(req) { const url = new URL(req.url); if (url.pathname === "/users") { const users = await db.select().from(usersTable); return new Response(JSON.stringify(users), { headers: { "Content-Type": "application/json" }, }); } return new Response("OK"); },});console.log(`Server running on port ${server.port}`);
The migrate() function reads the SQL files from your migrations directory and applies any unapplied migrations to the database. It is safe to run on every startup — already applied migrations are skipped.
Make sure your package.json has a start script:
package.json
{ "scripts": { "start": "bun src/index.ts" }}
Push your project to GitHub
Railway deploys from a GitHub repository. Initialize a git repository and push your code:
git initgit add .git commit -m "initial commit"
Create a new repository on GitHub and push your code to it.
Connect your GitHub repository to Railway
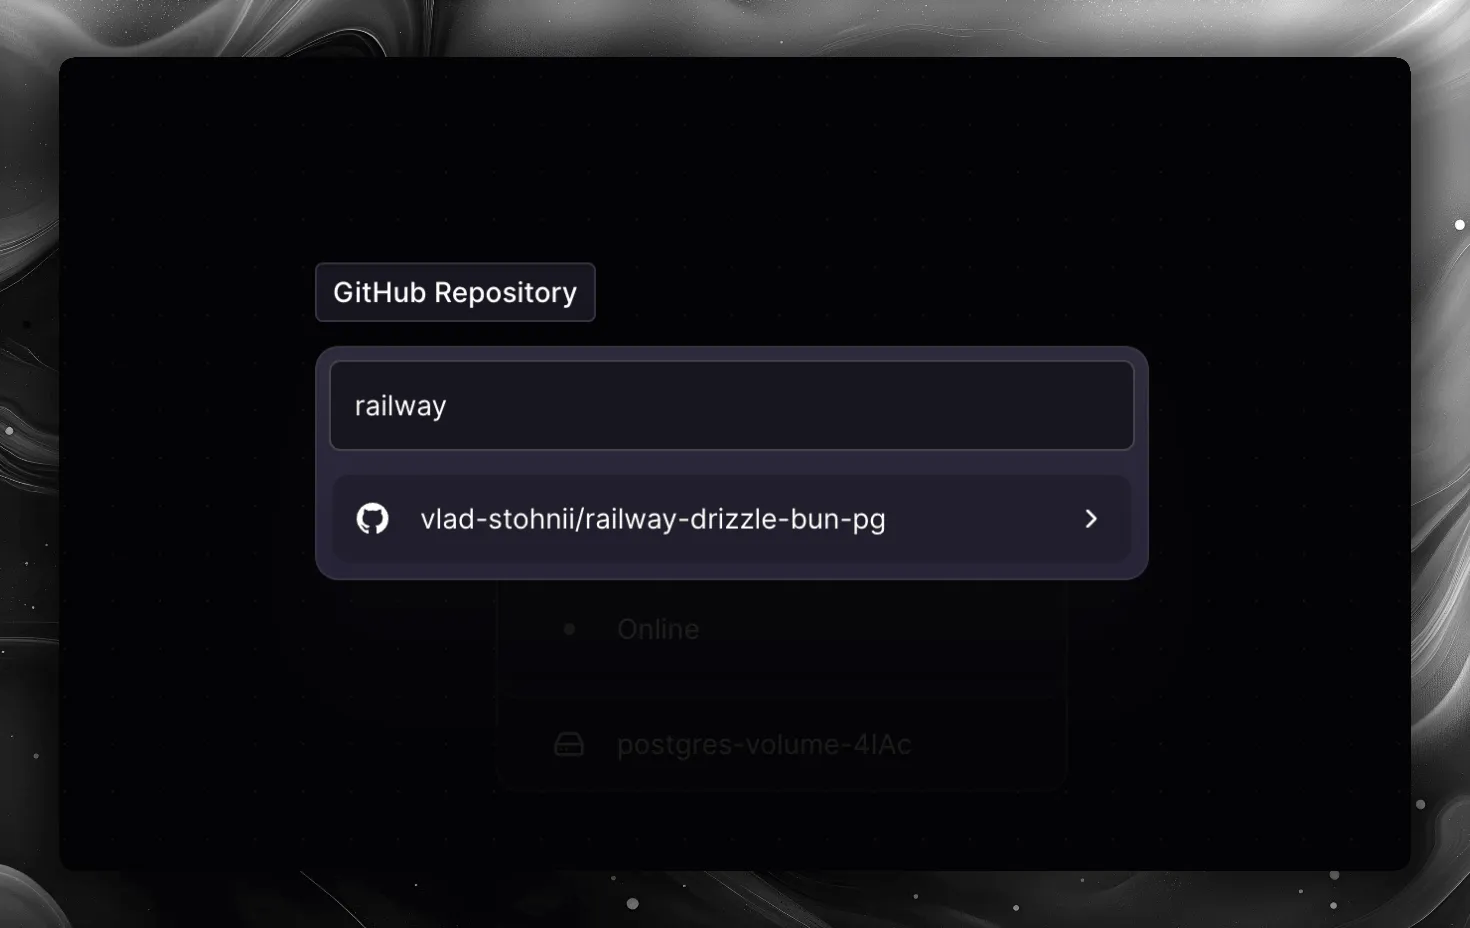
In your Railway project, click the New button in the top right corner of the canvas and select GitHub Repo. Connect your GitHub account if prompted, then select the repository you just pushed.
Configure environment variables
In the deployed service settings, go to the Variables tab. Add the DATABASE_URL variable by referencing the PostgreSQL service variable:
Click Add Variable, set the name to DATABASE_URL, and use the Railway variable reference ${{Postgres.DATABASE_URL}} as the value.
The ${{Postgres.DATABASE_URL}} reference variable automatically resolves to the private internal connection string at runtime, which is optimal for service-to-service communication within Railway. This is different from the public URL you use in your local .env file.
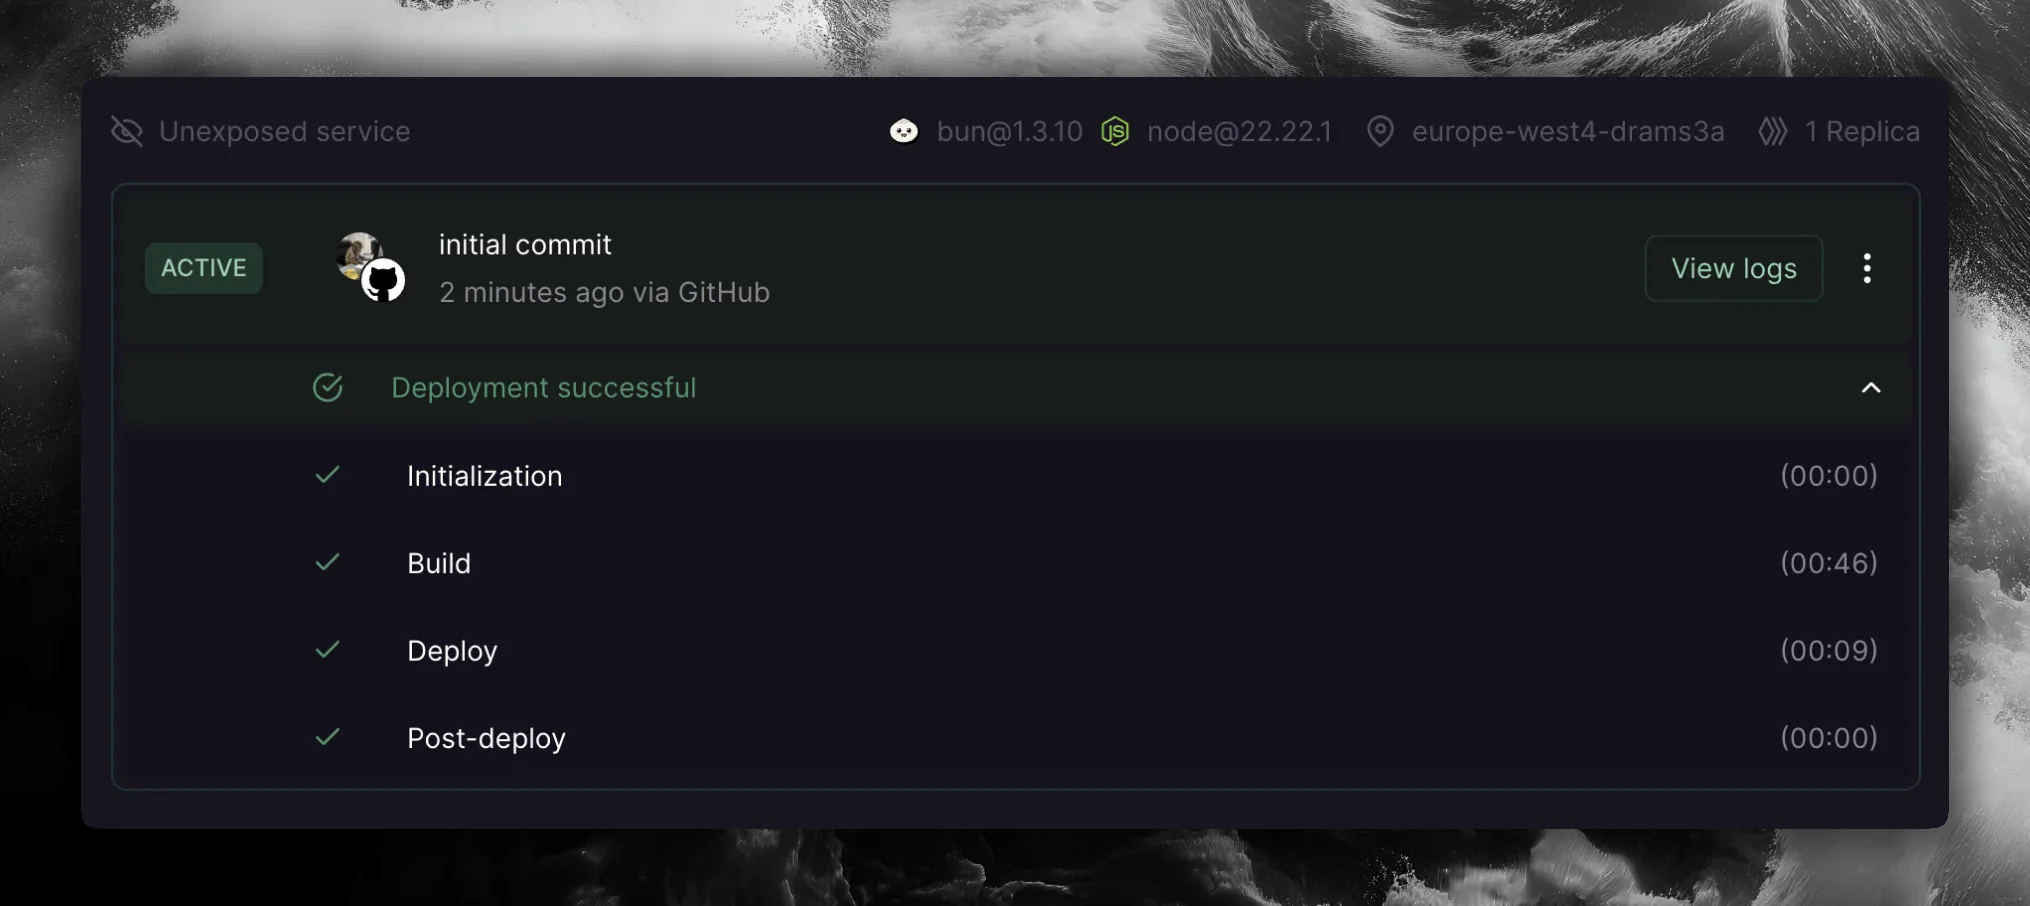
Deploy
Railway will automatically deploy your application when you push to the connected branch. You can monitor the deployment in the Deployments tab.
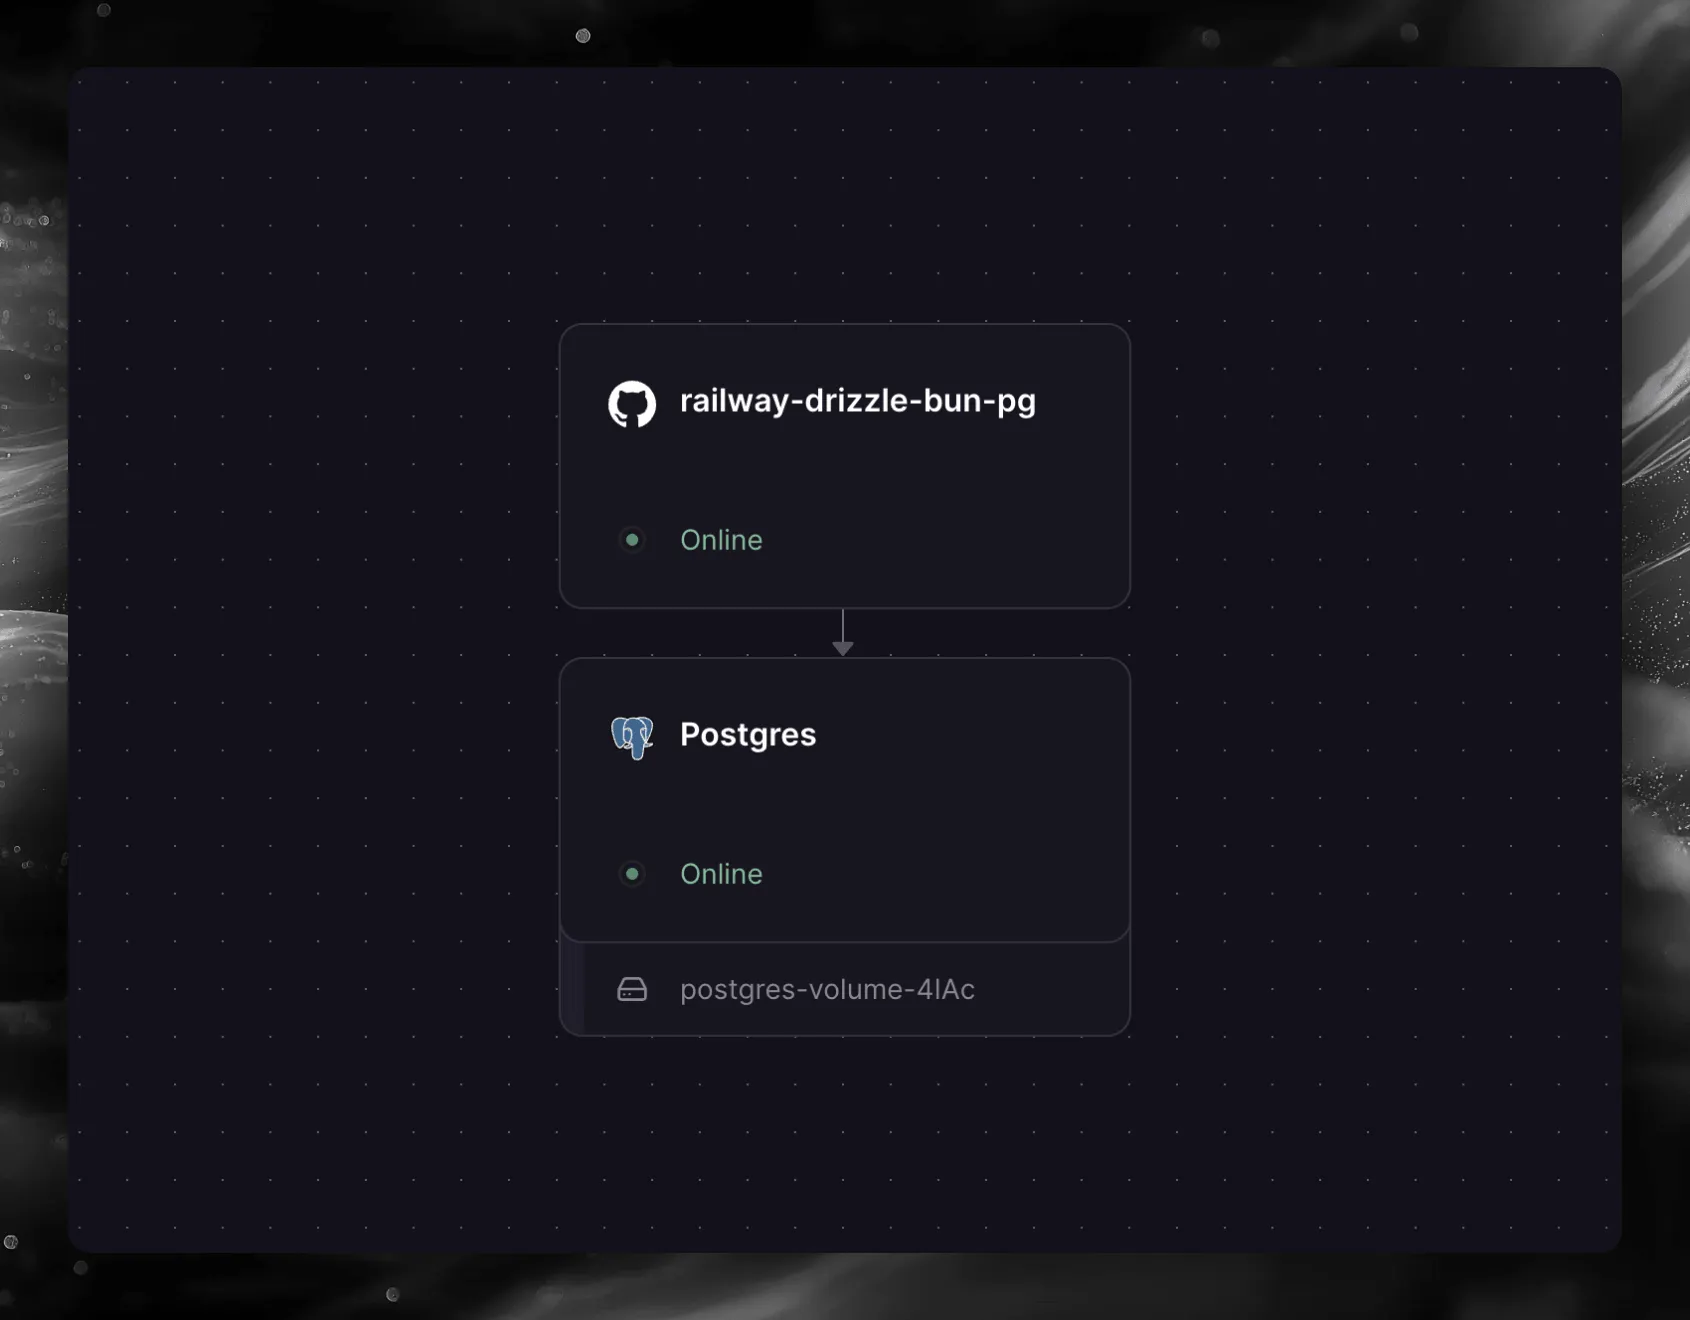
Verify your setup
Once deployed, navigate to the Architecture tab in your Railway project. You should see your application service connected to the PostgreSQL database.
Alternative: Zero-downtime migrations
This tutorial applies migrations at application startup using migrate(). This is the simplest approach and works well for most applications.
If you need zero-downtime deployments, you may want to run migrations as a separate step before the new version of your app starts receiving traffic. This way you can rollback the application independently from the database changes.
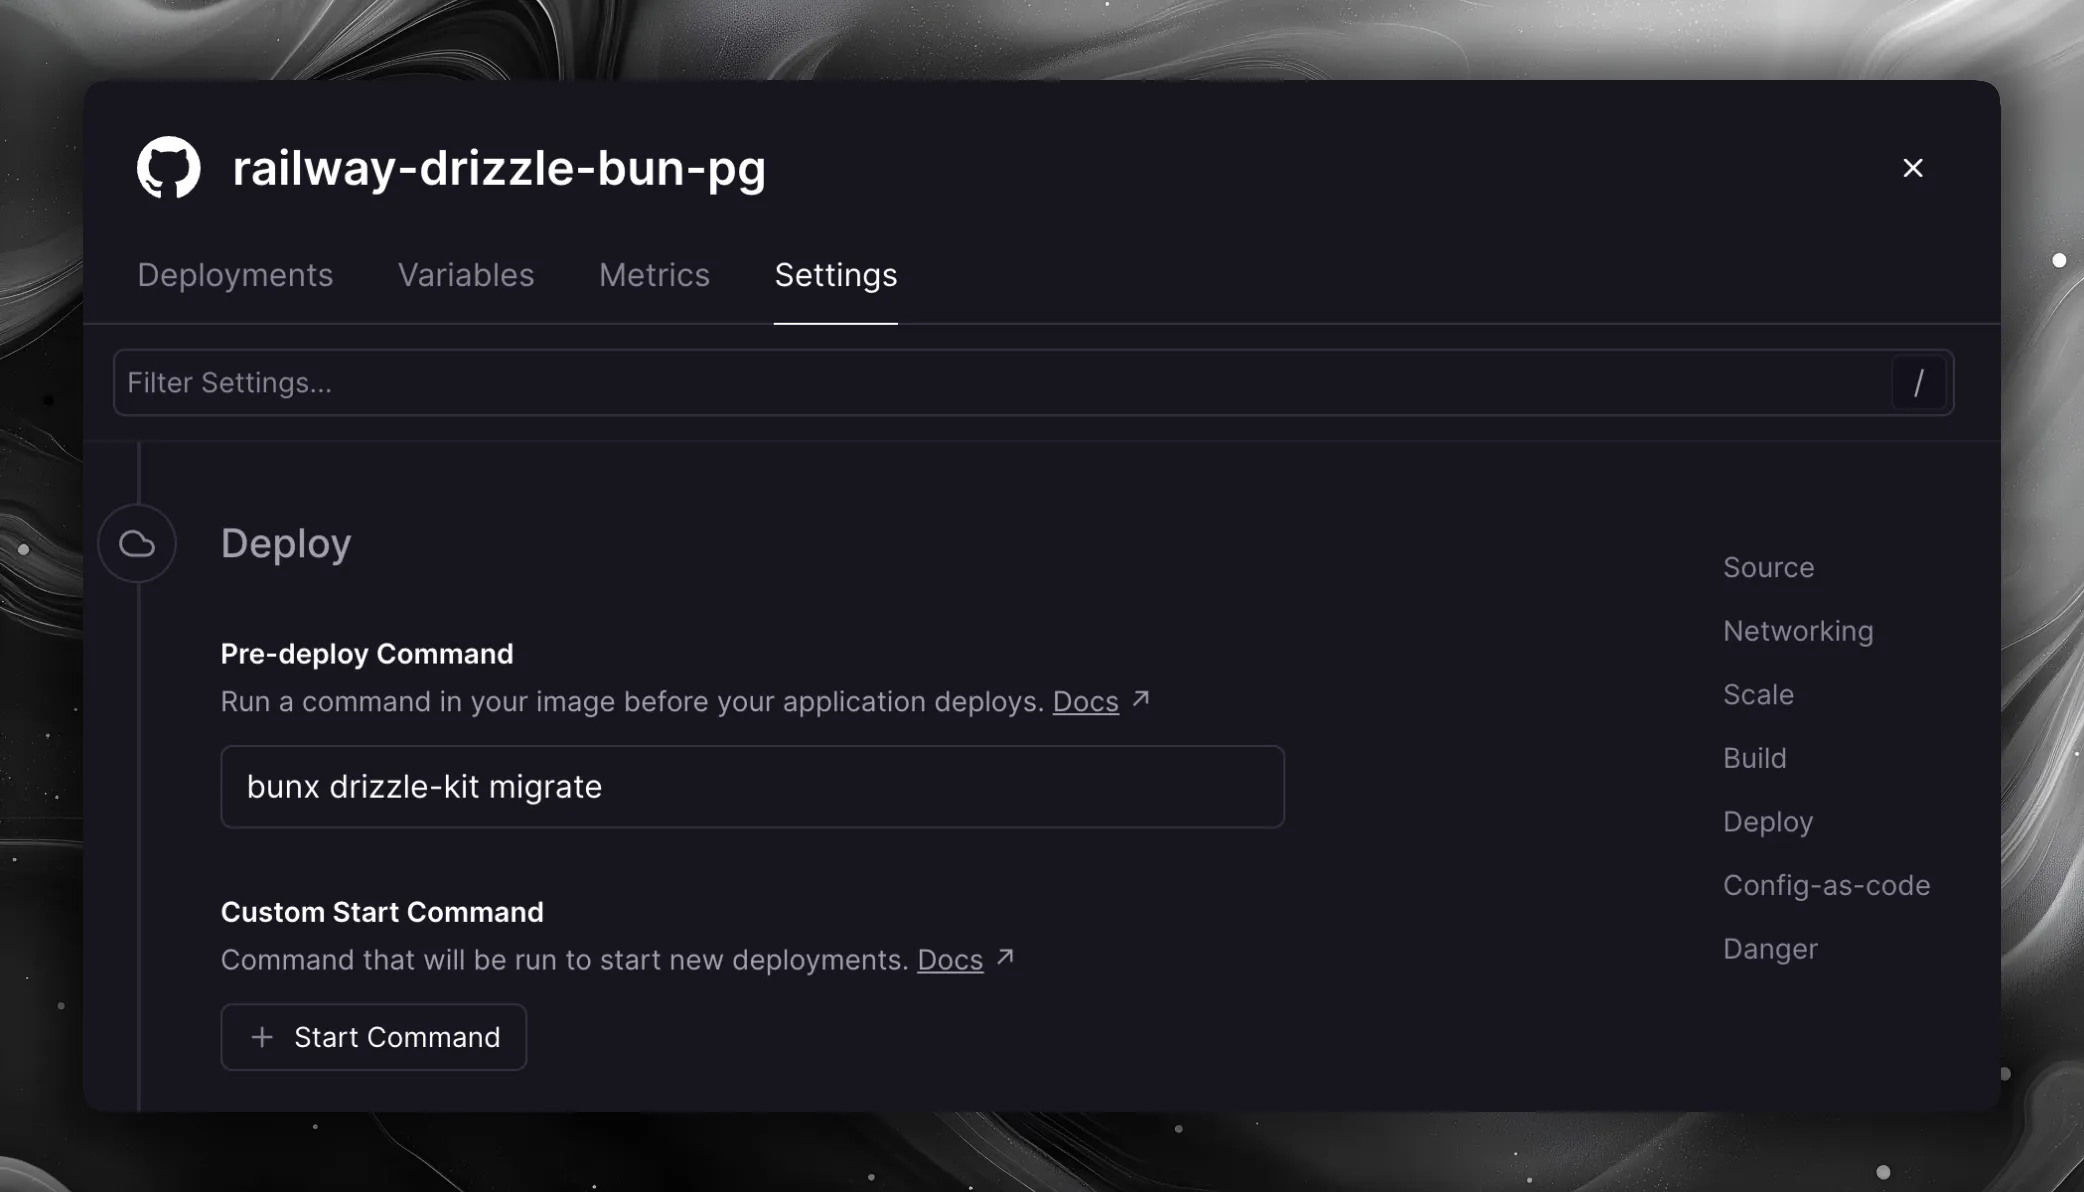
On Railway, you can achieve this using a pre-deploy command — it runs between the build and deploy phases, has access to your private network and environment variables, and if it fails, the deployment will not proceed.
In your service settings, scroll down to the Deploy section and click Add pre-deploy step:
Enter the following command:
bunx drizzle-kit migrate
With this approach, remove the await migrate(db, { migrationsFolder: "./migrations" }) call from your index.ts — migrations are handled by the pre-deploy command instead.
You can deploy Drizzle Studio alongside your application on Railway to browse and manage your database directly from the browser. You can use the Drizzle Studio Railway template or follow the steps below.
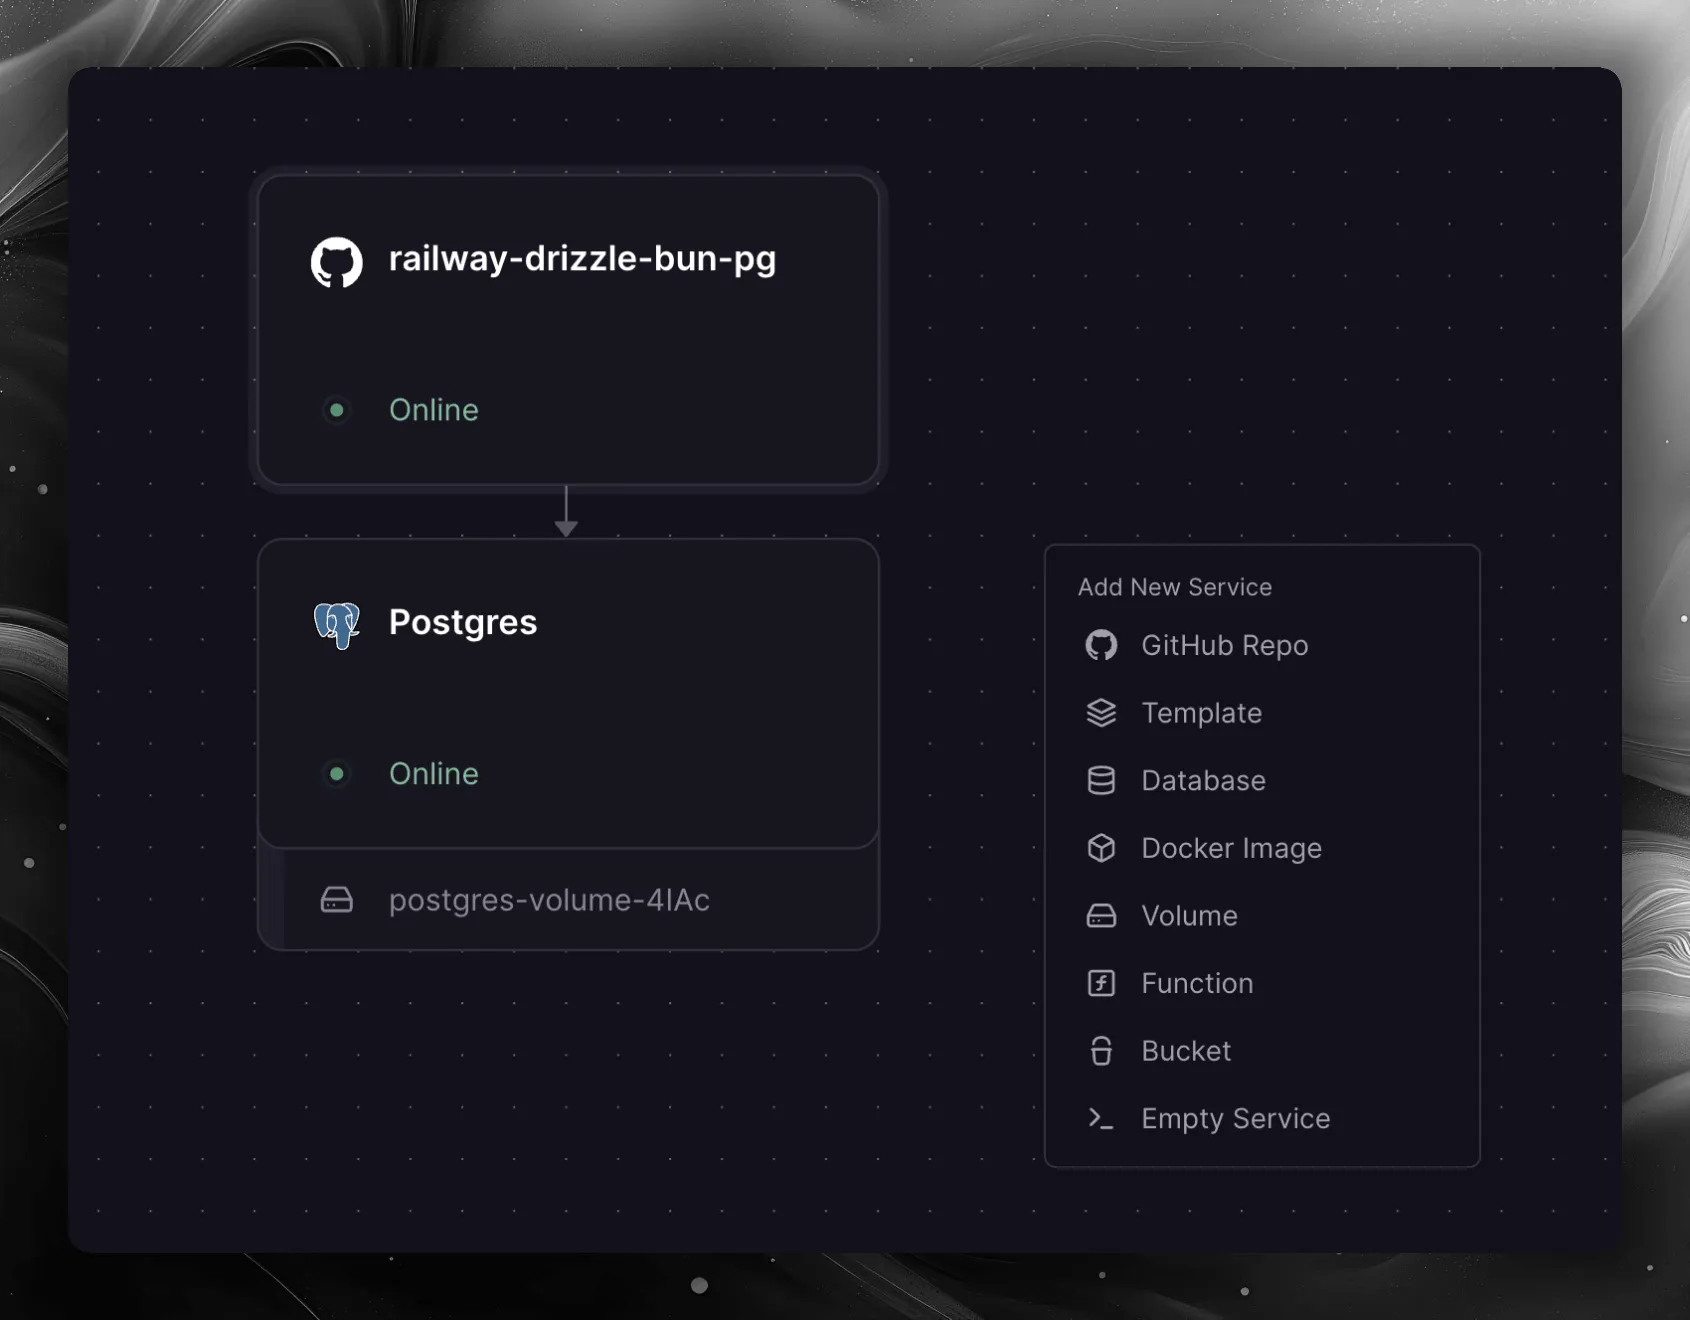
Add a new service from a template
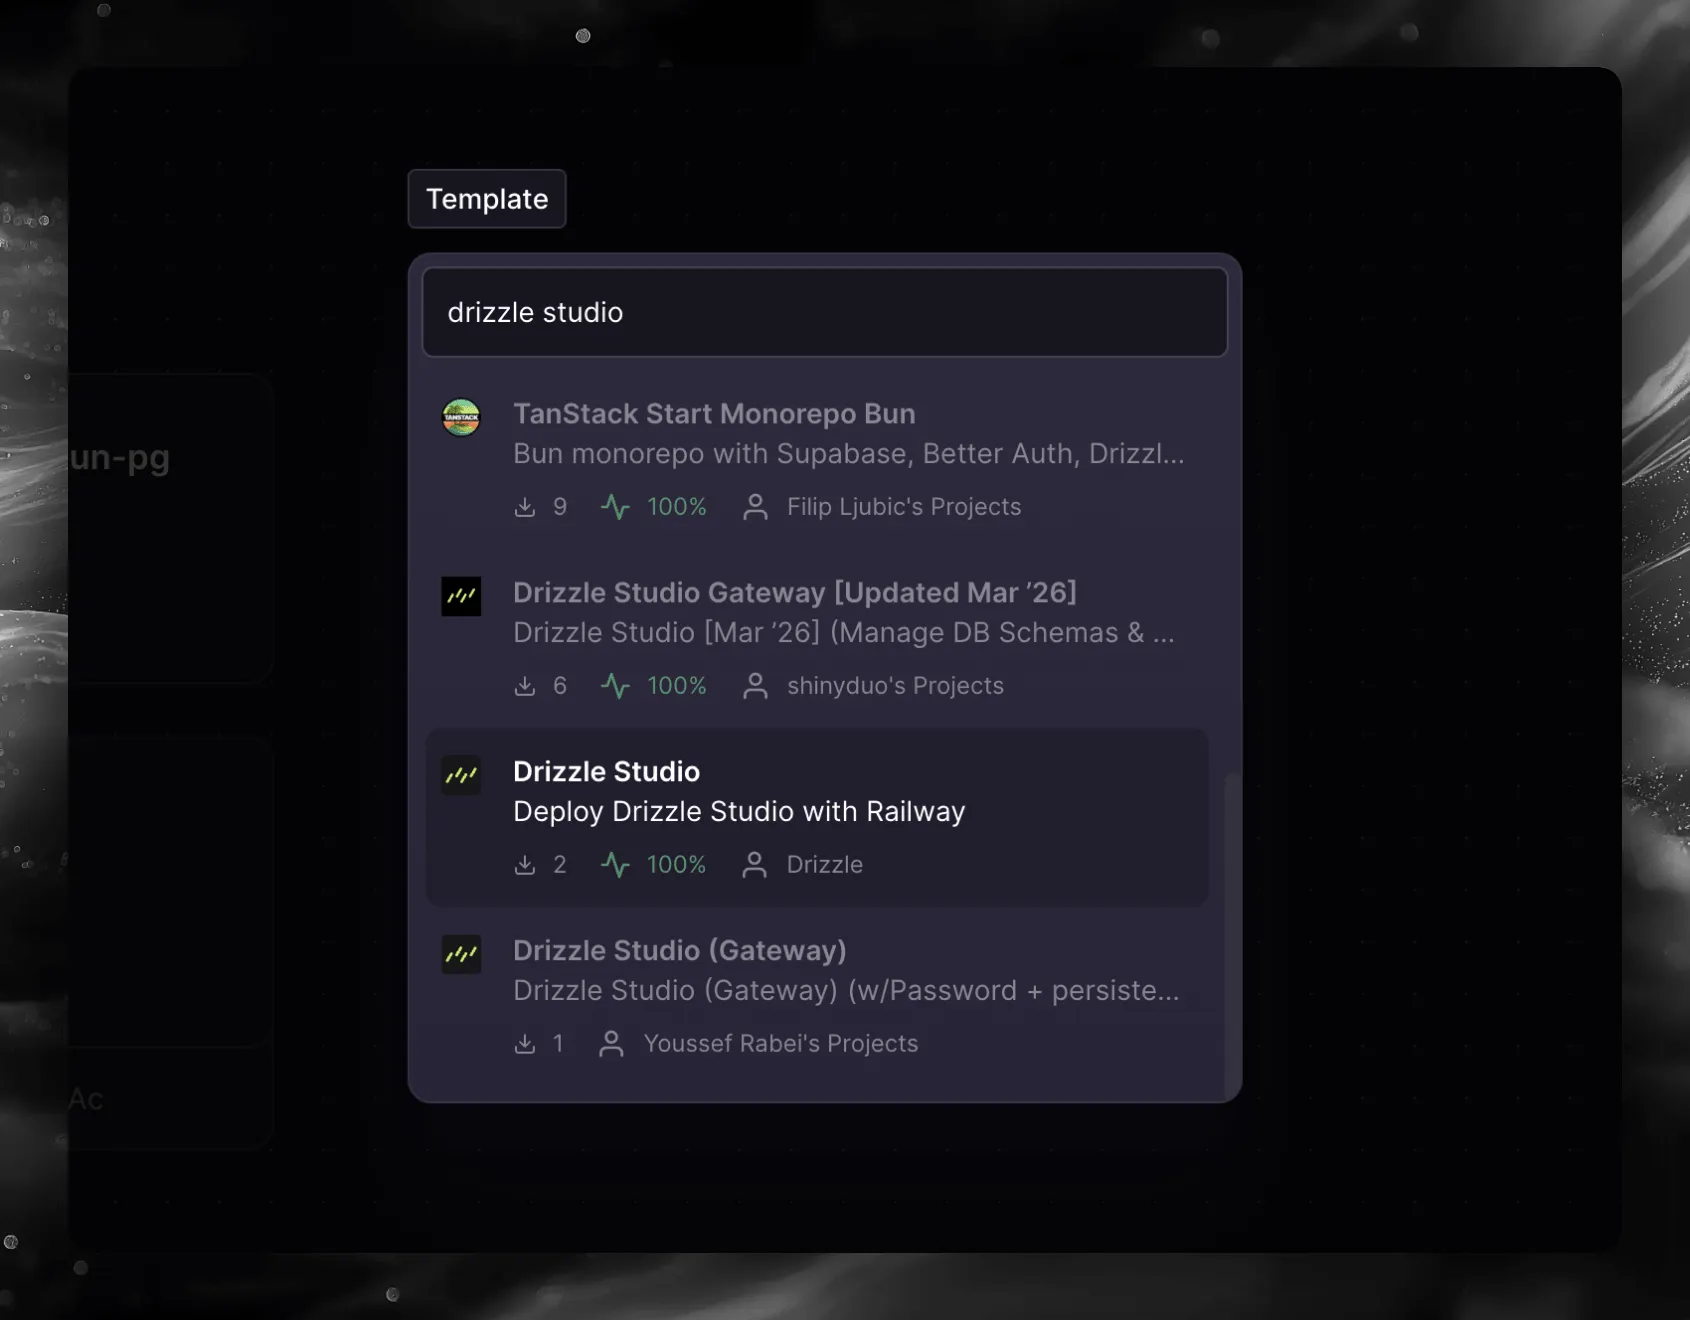
In your Railway project, click the New button in the top right corner of the canvas and select Template.
Select the Drizzle Studio template
Search for drizzle studio and select the Drizzle Studio template by Drizzle.
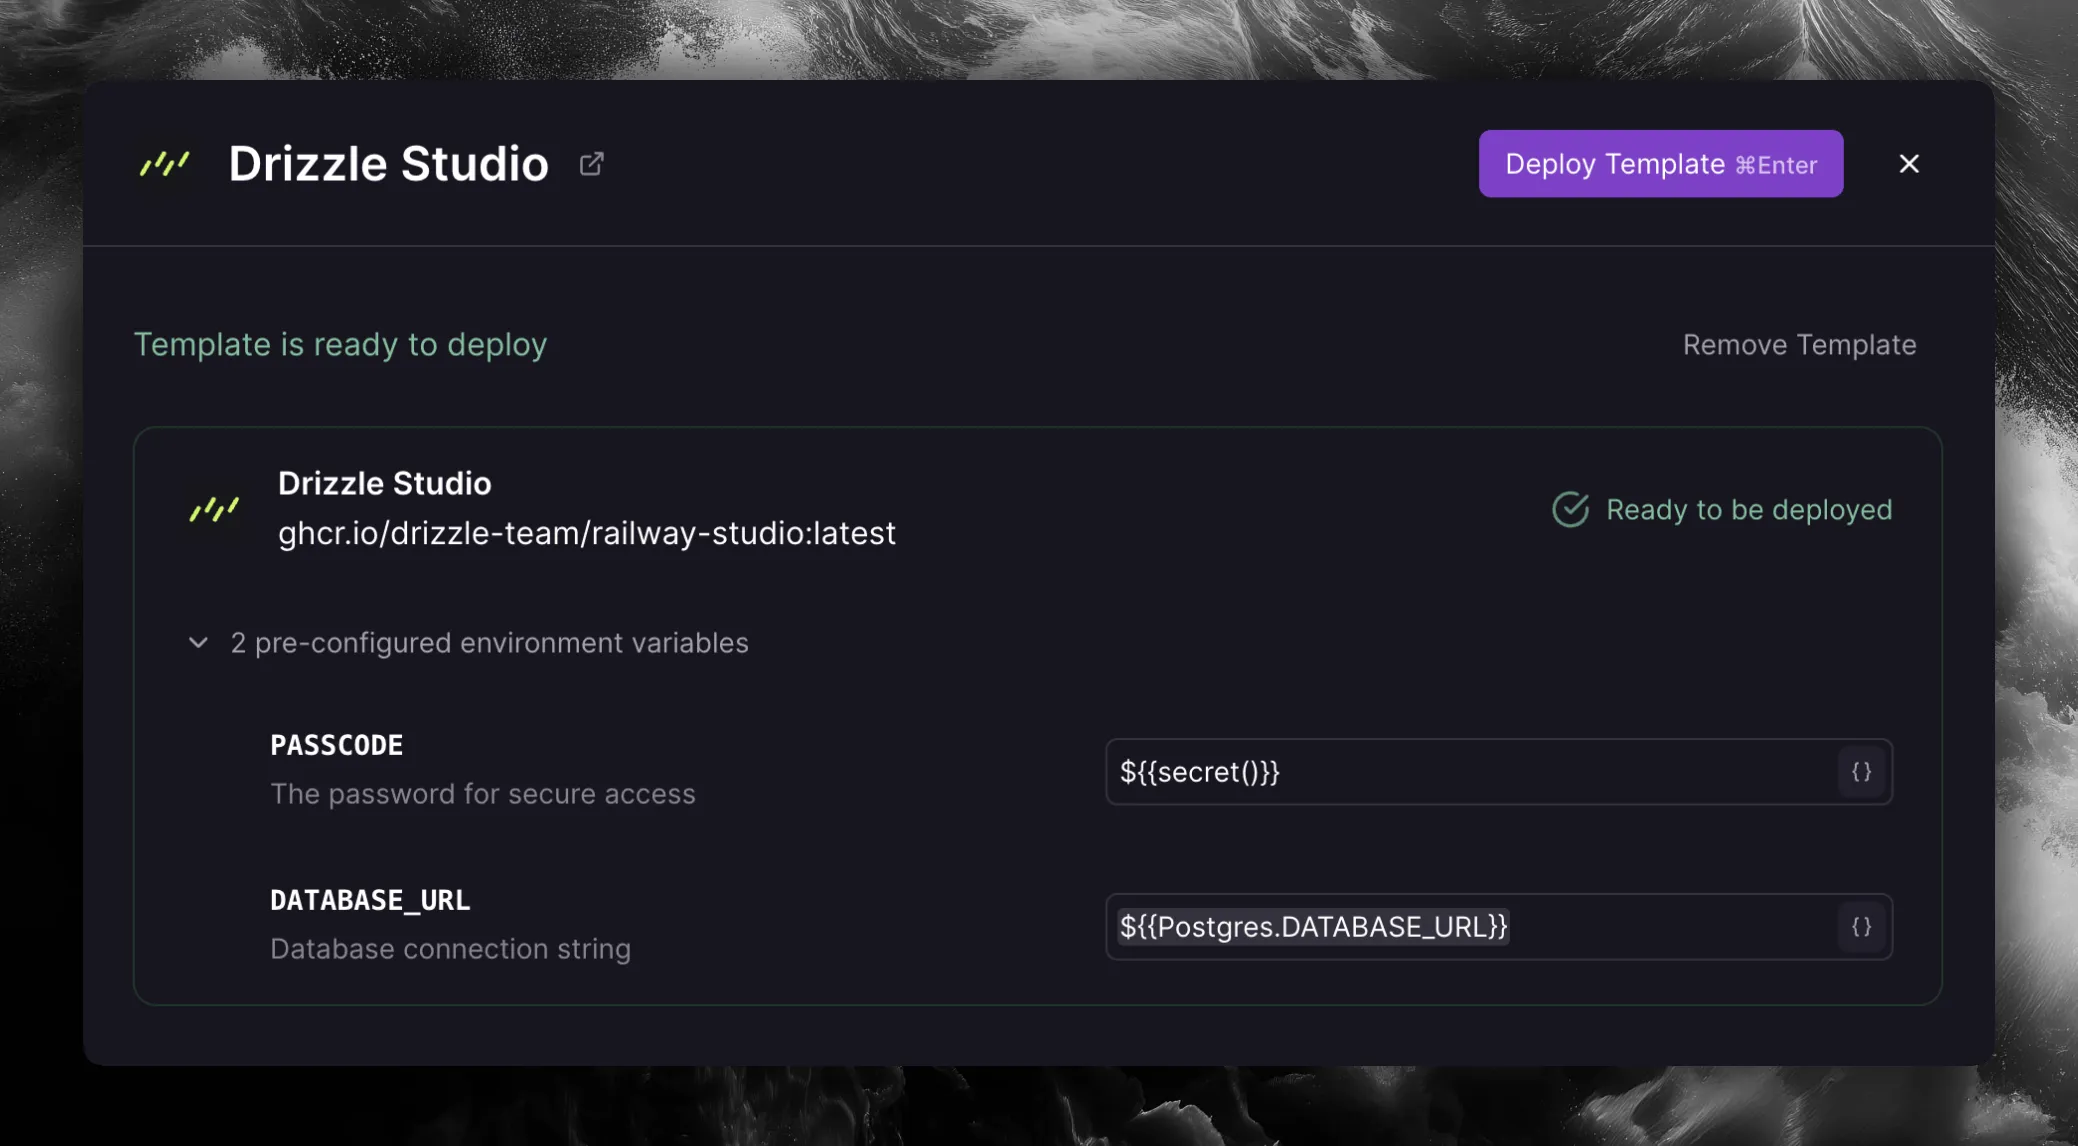
Configure environment variables and deploy
The template comes with two pre-configured environment variables:
PASSCODE - the password for secure access to your Studio instance. It defaults to ${{secret()}}, which generates a random secret.
DATABASE_URL - the database connection string. Set it to ${{Postgres.DATABASE_URL}} to reference your existing PostgreSQL service.
Click Deploy Template to deploy.
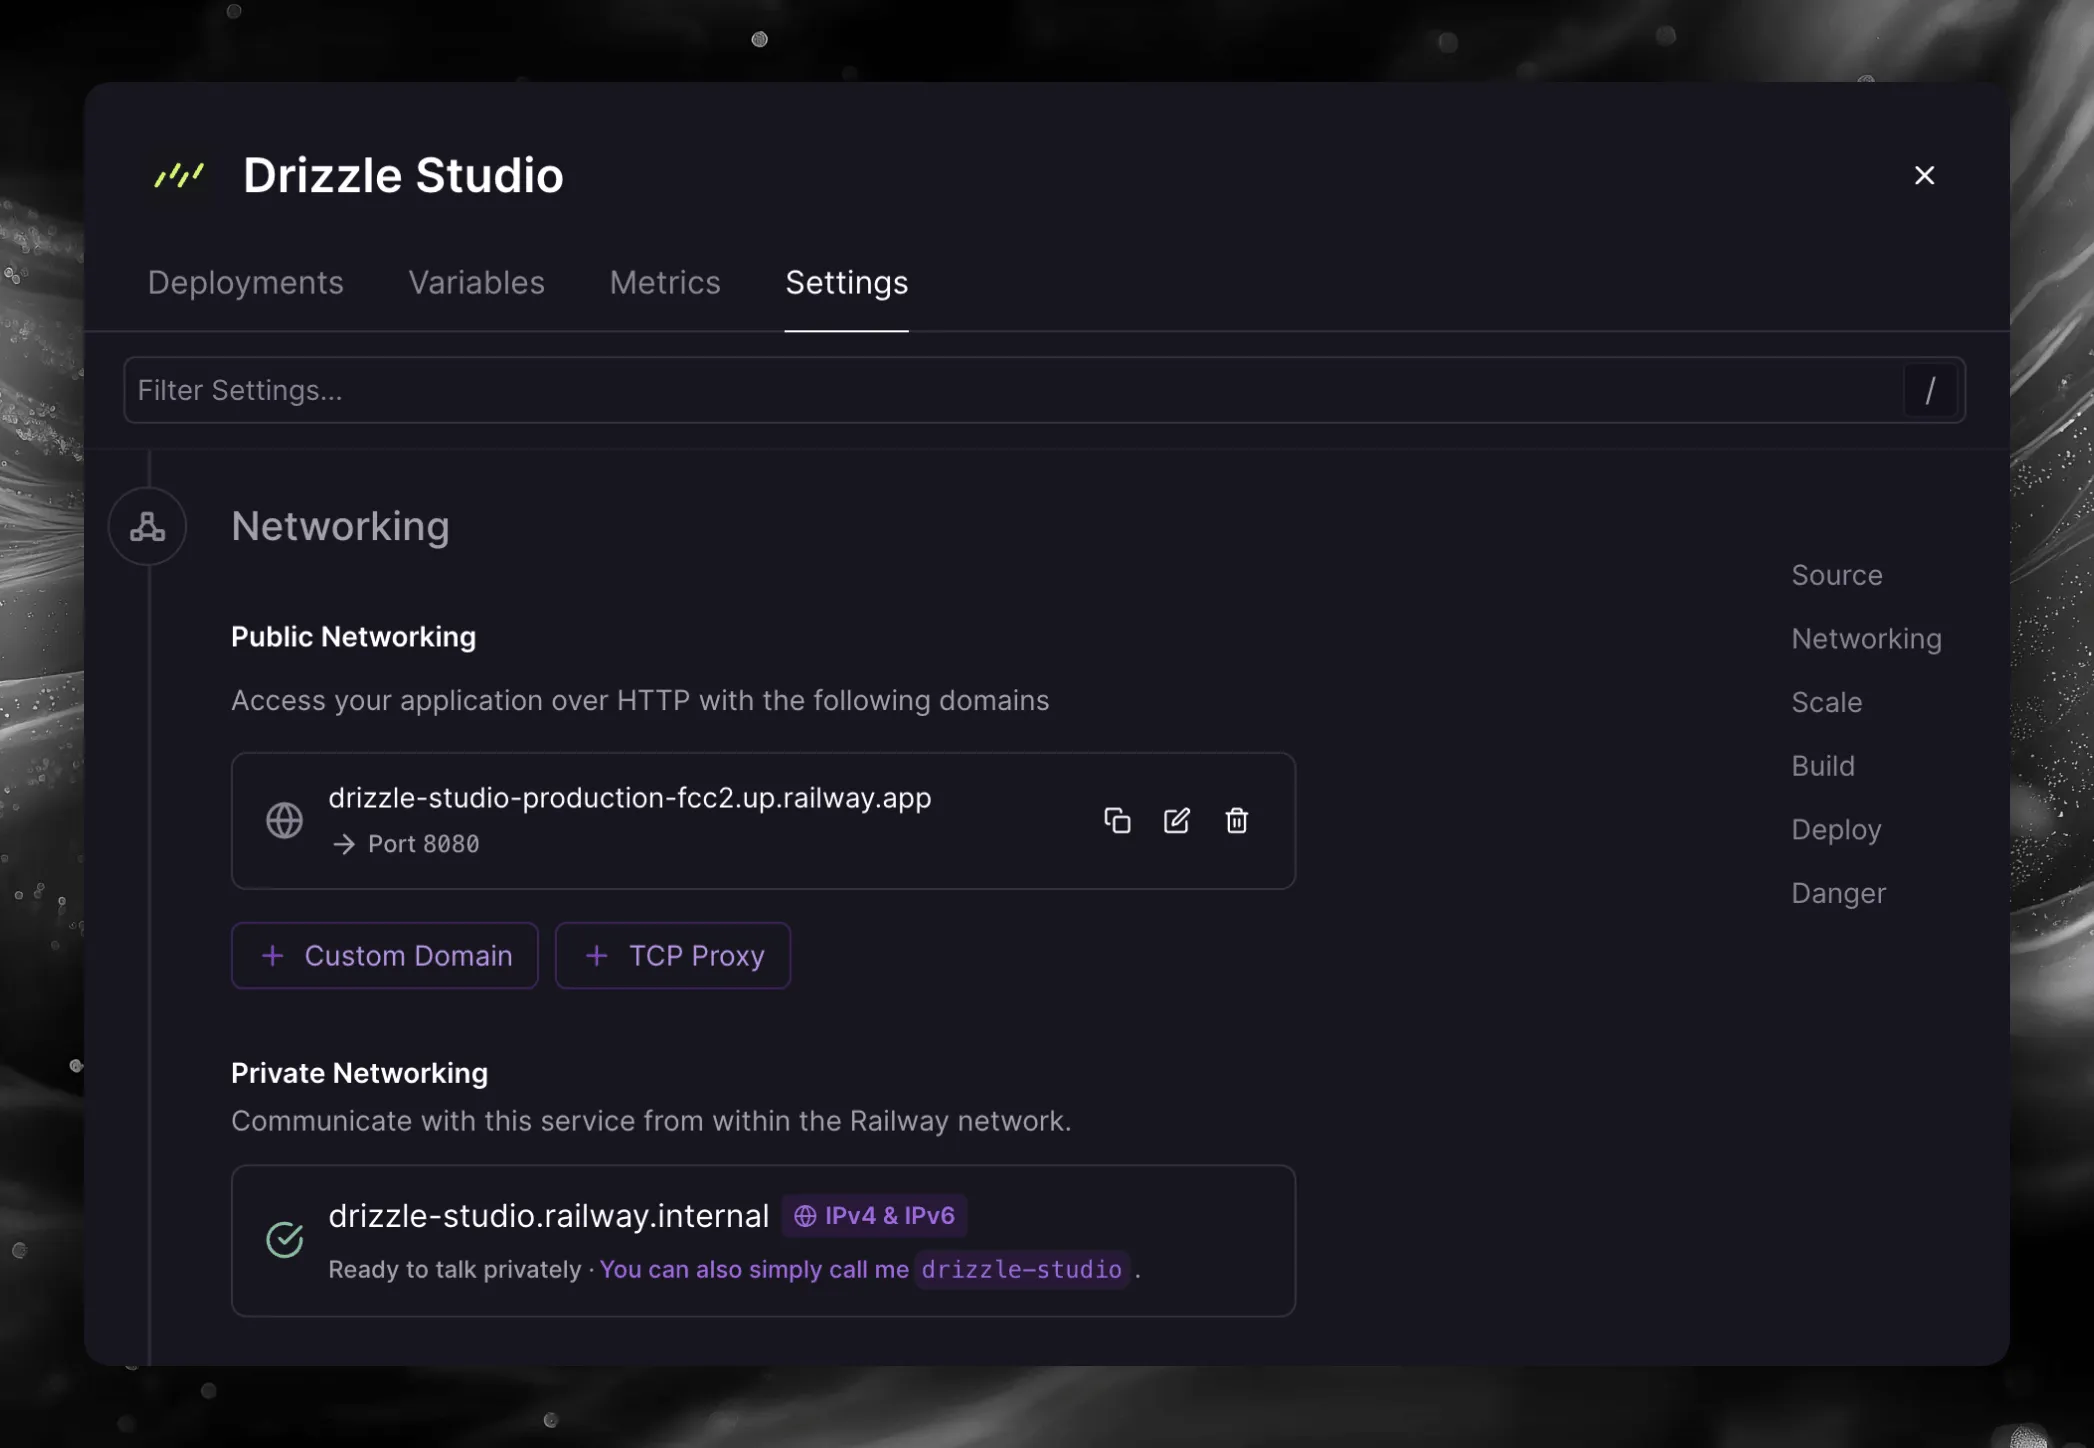
Find your Drizzle Studio URL
Once deployed, click on the Drizzle Studio service in your project, go to the Settings tab, and scroll down to the Networking section. You will find your public domain under Public Networking.
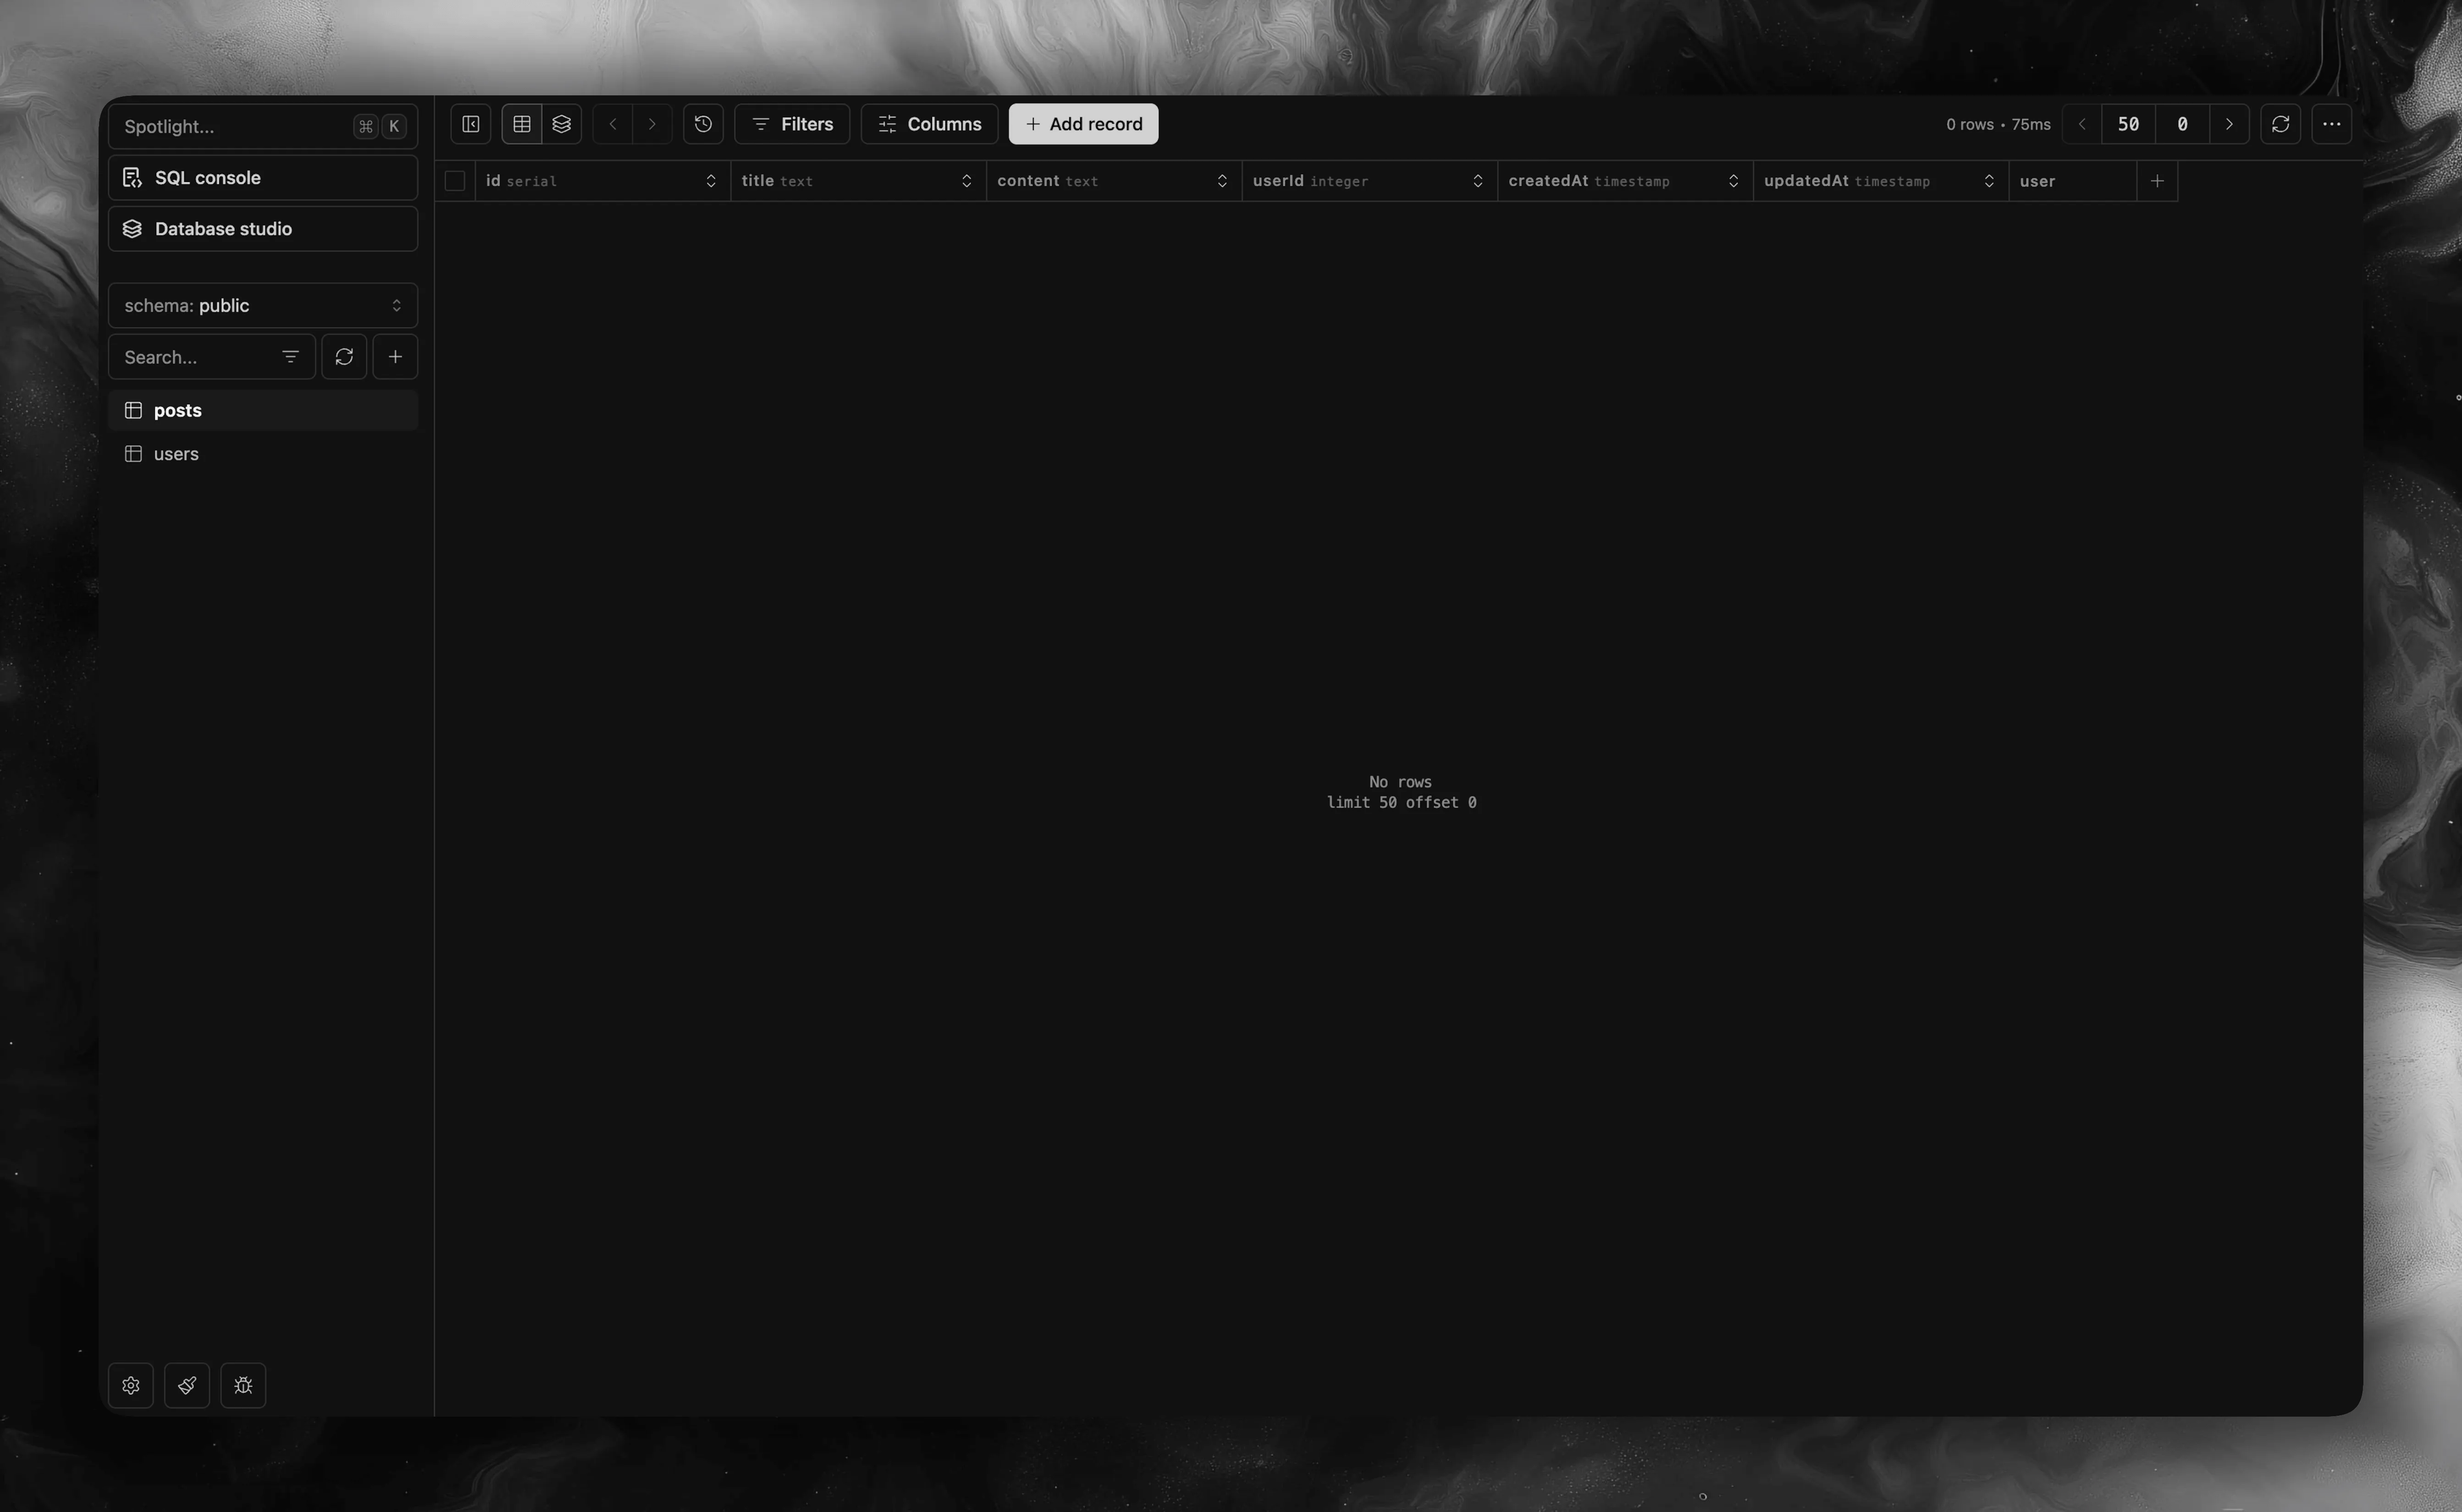
Browse your database with Drizzle Studio
Open the Drizzle Studio URL in your browser. You should see your database tables and can browse, filter, and edit data directly.
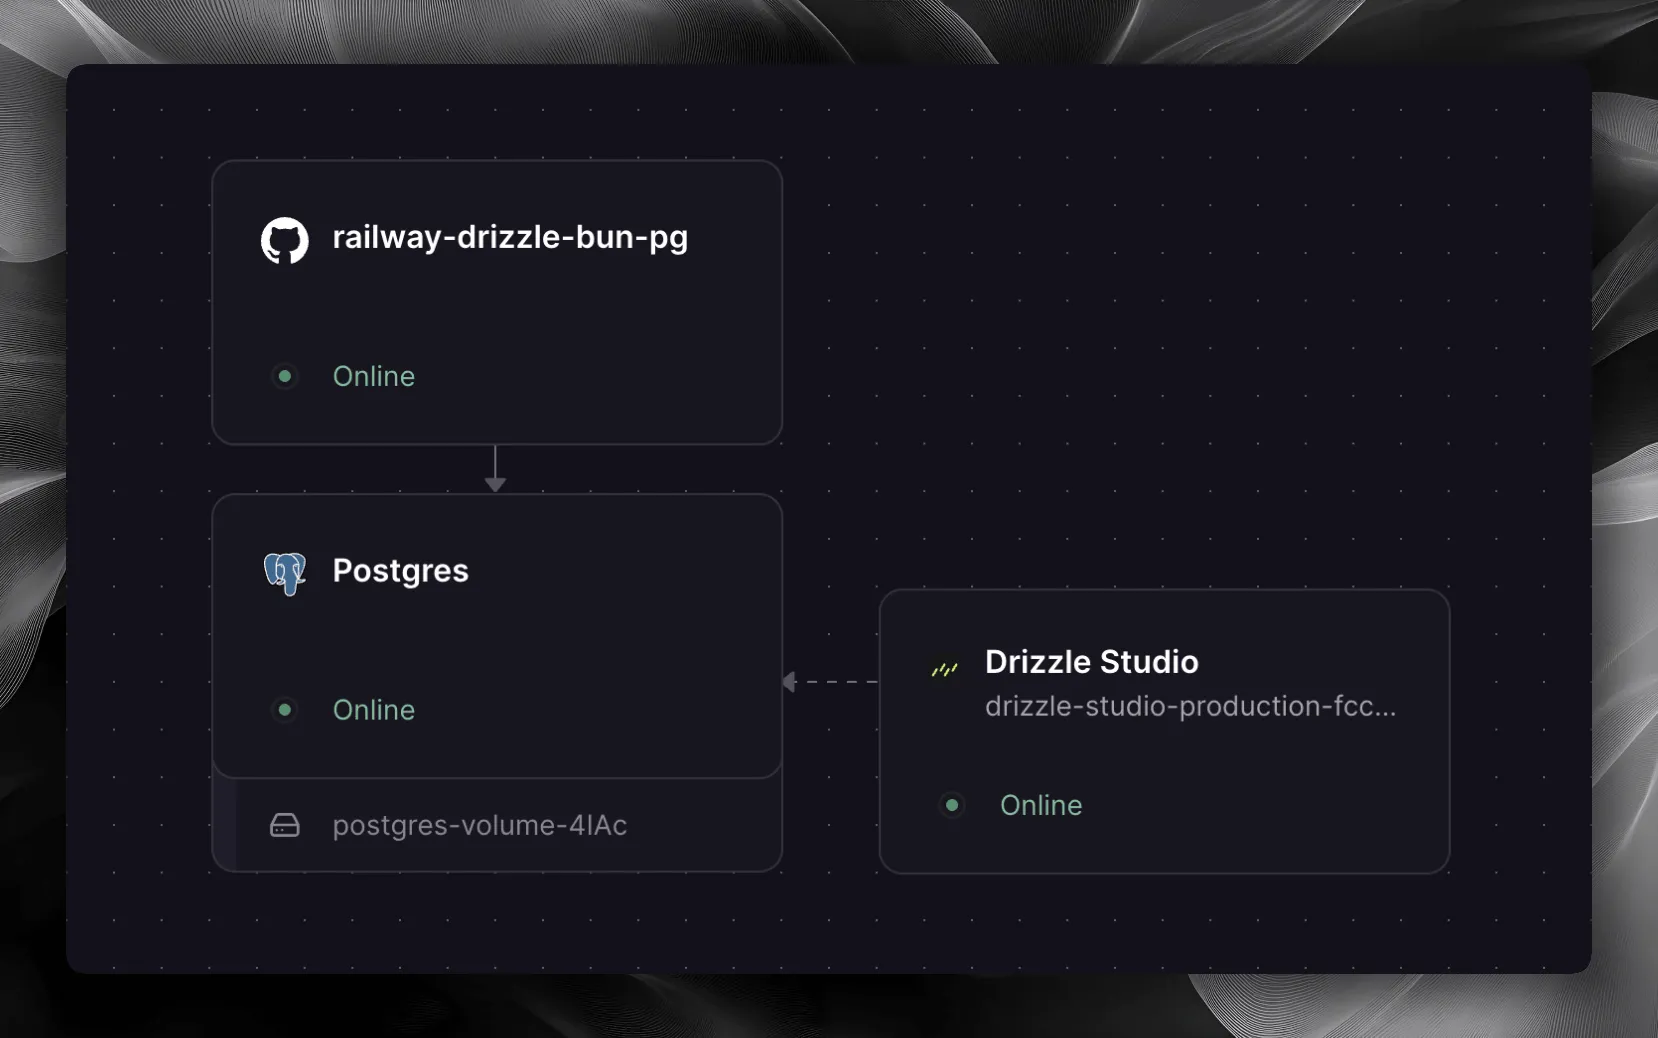
Verify your setup
Navigate to the Architecture tab in your Railway project. You should now see three services: your application, the PostgreSQL database, and Drizzle Studio.